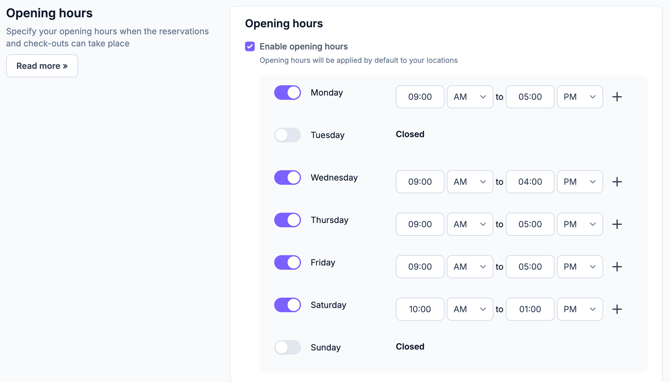
Lock down your calendar so your users won't be able to create reservations or check-outs too early in the morning, after closing at night or on the weekends.
- Click on "Settings" from the Navigation Bar on the left side of the screen
- From the Settings page, click on "Opening hours & closed days"
- Add the checkmark to "Enable opening hours"
- Specify the hours your business is available each day by toggling each day on or off, and setting the opening to closing time
- You can set break times in between, to account for lunch breaks, or times when the gear room temporarily closes on a daily basis by clicking on the "+" on the right of each day to add a new time slot
- Click Save on the top right of the page to commit the changes
💡Tip: You can update your users on changes in the opening or closing hours by adding them to your notifications as well. Just click on the dropdown list and search for 'opening hours'.
Setting up opening hours per location
-
Go to your Settings in the bottom left corner of your screen
-
Click Locations
-
Hover over a location and click Edit
-
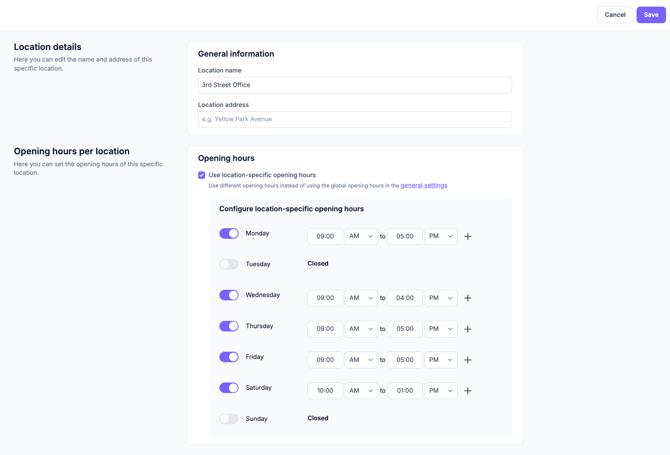
The Location overview page will appear with the Location details and the Opening hours per location
-
At this stage, you can choose to enable specific opening hours for a location. By default, the opening hours per location will be pre-filled with the account's opening hours. A link to the general opening hours is also provided to make it easier for you
6. Let the fun begin!
- Start to add each locations' opening hours according to your schedule.
- The slider helps you to mark specific days as closed.
- The + icon allows you to create specific intervals (for example, if the location is closed during the lunch break).
- Do not forget to click Save on the top-right corner of your screen when you are done, otherwise the changes will not be saved.