![horizontal-black-3.png]](https://knowledge.cheqroom.com/hs-fs/hubfs/horizontal-black-3.png?width=200&height=37&name=horizontal-black-3.png)
Overview
If your equipment already has barcode labels, you can add those codes to Cheqroom instead of using the QR codes Cheqroom generates. The fastest way to do this for many items at once is to import a spreadsheet with a barcode column.
This article walks admins through that import step by step. It also covers adding a barcode to a single item or kit from the web app or the mobile app.
Before you start
Check these four things first so the import goes through cleanly.
- You have the correct access. Importing items requires a role that can create and edit items.
- Your equipment is labeled. Put your barcode labels on the equipment first, and keep a list of which code belongs to which item.
- Each barcode is 4 to 24 characters and uses only letters and numbers (A–Z, 0–9). Each code should belong to one item only.
- Your barcode type is supported. Cheqroom can scan the formats below.
|
Barcode type |
Common use |
|
QR |
Square 2D codes |
|
Code 39 |
Older asset tags, ID labels |
|
Code 128 |
Most printed asset labels |
|
PDF417 |
Stacked 2D codes, IDs |
|
DataMatrix |
Small 2D codes on electronics |
|
EAN-8 |
Short retail codes |
|
UPC-12 |
Retail product codes |
Step 1: Prepare your spreadsheet
Build a spreadsheet with one row per item and add a column that holds each item's barcode. You can find the import template in your Cheqroom account by navigating to Items>Import (and then selecting either an Excel or CSV template to download and use).
- Open your inventory list in Excel.
- Put your column names in the first row, for example Name, Category, Location and Barcode.
- Enter one item per row. Type the barcode exactly as it is printed on that item's label.
- Format the Barcode column as Text before you paste codes in. This stops the spreadsheet from dropping leading zeros or turning long numbers into scientific notation (for example 1.23E+11).
- Save the file as an Excel or CSV (comma-separated values) file.
Tip: try a small test file of 5 to 10 items first. Once it imports correctly, import the rest.
Step 2: Import the spreadsheet into Cheqroom
Upload the file, map the correct columns, then start the import.
- In the Cheqroom web app, go to Items.
- Click the Import button in the top right corner.
- Upload your CSV file. Make sure one of its columns contains your barcodes.
- Indicate whether your spreadsheet has labels (column names) as the first row. If you followed Step 1, choose yes so your headers aren't imported as an item.
- Map each column to the matching Cheqroom field. Map your Barcode column to the barcode field. For any column you don't want to bring in, choose Ignore.
- Click Next.
- Review the results. Fix any import errors shown, then read the warnings to decide whether anything needs changing. If you edit the CSV, upload it again.
- Click Start import.
Cheqroom creates your items with your own barcodes attached. Scanning a label will now open the matching item.
Step 3: Check the result and test a scan
Confirm a few items before you rely on the codes day to day.
- Go to Items and open one of the items you imported.
- Open the Info tab and check that the code shown matches the label on the equipment.
- Open the Cheqroom mobile app, or use a Bluetooth scanner, and scan the label. The matching item should open.
- Repeat for two or three more items from different rows of your file.
Other ways to add a barcode
For one or two items, it's quicker to add the code by hand than to import a file.
On the web app
- Click Items, then select an item.
- Go to the Info tab.
- On the right, remove the QR code Cheqroom generated, then choose Add code.
- Scan your barcode with a Bluetooth scanner (alternatively, you can also manually type in the barcode if you do not have a scanner).
On the mobile app
- Tap the dropdown icon in the top left corner.
- Tap Items, then select an item.
- Go to the Info tab at the bottom of the screen.
- Remove the QR code Cheqroom generated, then choose Add code.
- Scan your barcode.
If something goes wrong
Most barcode import problems come from how the spreadsheet stored the codes.
|
What you see |
Likely cause |
How to fix it |
|
Import error on the barcode column |
A code is shorter than 4 or longer than 24 characters, or has spaces or symbols |
Edit the code so it's 4 to 24 letters and numbers, then upload again |
|
Codes lost their leading zeros (00451 became 451) |
The spreadsheet treated the column as numbers |
Format the Barcode column as Text, re-enter the codes, save as CSV again |
|
Codes look like 1.23E+11 |
The spreadsheet shortened long numbers |
Format the column as Text and re-enter the codes |
|
Error that a code is already in use |
Two rows share a code, or an item already has it |
Make sure each code appears once in your file and isn't on an existing item |
|
Your column names were imported as an item |
"Labels as first row" wasn't selected |
Delete that item, then select the option next time |
|
Barcode column didn't import |
The column was set to Ignore during mapping |
Re-import and map that column to the barcode field |
|
Scanning a label doesn't find the item |
The code in Cheqroom doesn't match the printed label |
Open the item's Info tab, compare the two, and correct the code |
Common labeling workflows
Most teams label their equipment in one of two ways. Pick the one that matches how you get your labels.
Workflow 1: You bought labels from the Cheqroom store
Store labels arrive with their codes already printed. You need to link each label to the right item in Cheqroom. You can do this after you import your items, or before.
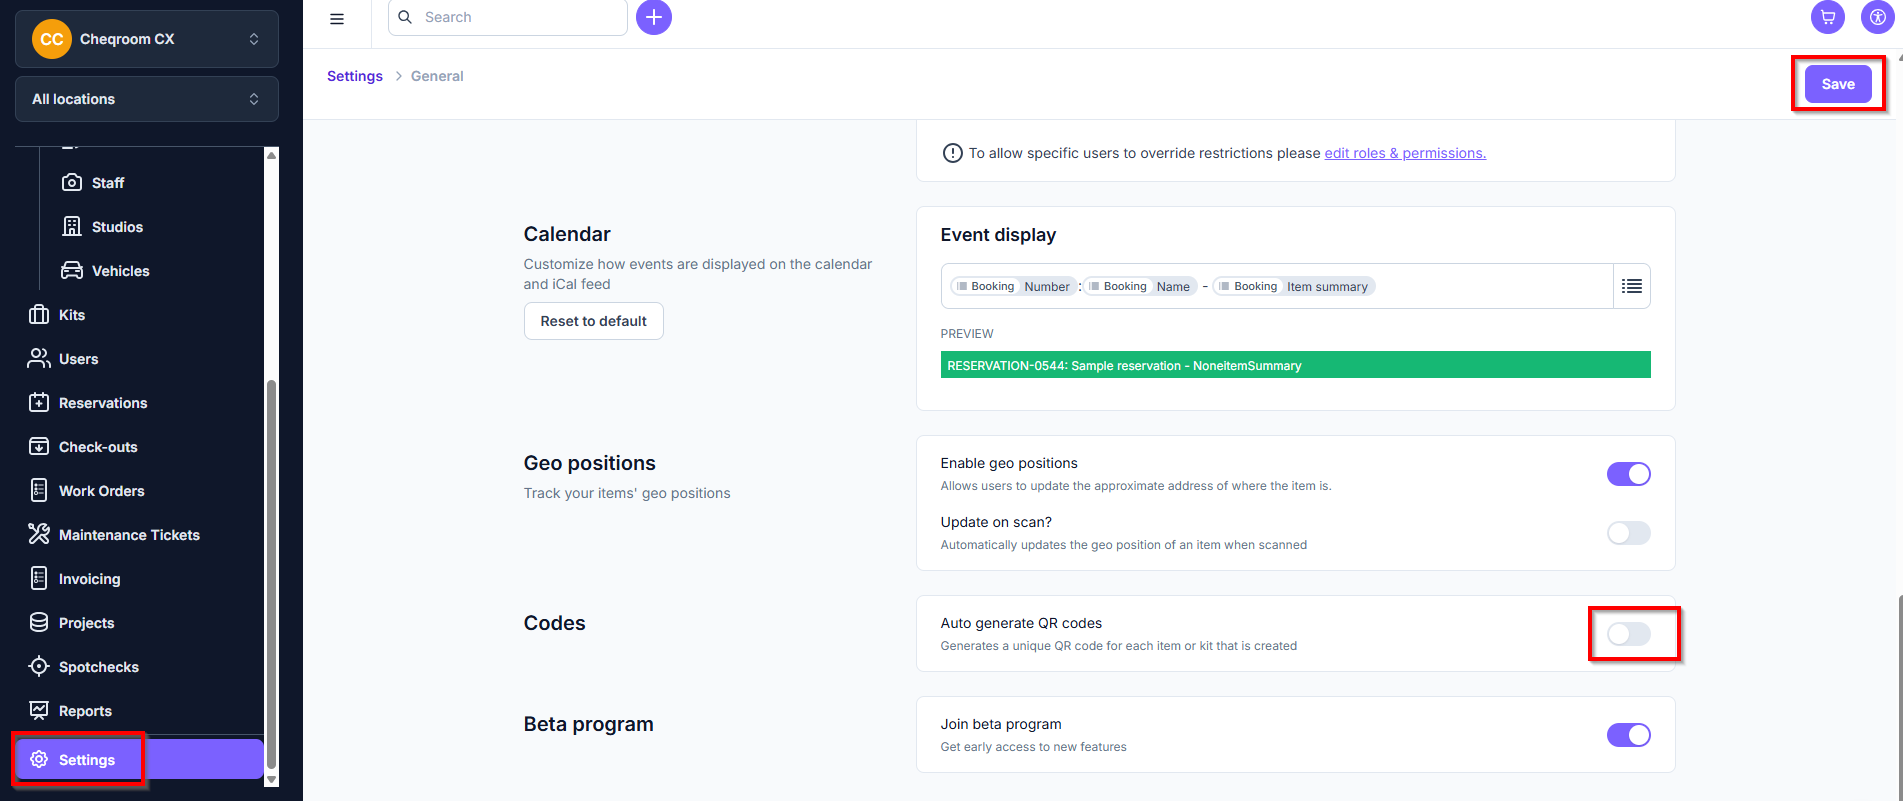
First, turn off automatic QR codes so Cheqroom doesn't create codes you won't use:
- Go to Settings in the bottom left corner of your screen.
- Click General.
- Scroll down to the Codes section.
- Turn the QR code generator off and then click Save.
Option A: Import your items first, then link each label
Choose this if your items are already in a spreadsheet but not yet labeled.
- Import your items without a barcode column. Follow Step 2 above and skip the barcode mapping.
- Stick a store label on each piece of equipment.
- In the web app or mobile app, open an item and go to the Info tab.
- Choose Add code, then scan the label on that item.
- Repeat for each item. The mobile app is fastest because you can walk to the equipment and scan as you go.
Option B: Label your items first, then import the codes as a column
Choose this for large inventories. You link every label in one import instead of item by item.
- Stick a store label on each piece of equipment.
- Write down or scan each label's code into your spreadsheet, on the same row as that item. A USB or Bluetooth scanner can type codes straight into a spreadsheet cell.
- Follow Steps 1 to 3 above to prepare the file, import it with the barcode column mapped, and test a scan.
Tip: if you reorder store labels later, email store@cheqroom.com so your new labels don't repeat codes you already use.
Workflow 2: You use the QR codes Cheqroom generates and print them yourself
Cheqroom creates a unique QR code for every item you add, so you don't need your own barcodes. You print the labels from Cheqroom and stick them on.
- Make sure the QR code generator is on (Settings > General > Codes). It's on by default.
- Add your items, either one at a time or by importing a spreadsheet. Leave out the barcode column; Cheqroom creates a code for each item.
- Go to Items and make sure you're in the Table view.
- Use the checkboxes on the left to select the items you want labels for.
- Click Bulk actions, then Print labels.
- Pick a Label template. If needed, also pick a Page layout (for example, sheet labels).
- Click Print.
- Stick each label on the matching item. Check the item name on the label so each one goes on the right piece of equipment.
- Scan two or three labels with the mobile app to confirm they open the right items.
Tip: for very large sets (several hundred items), print in batches of about 50 to avoid errors. You can use a DYMO LabelWriter or standard label sheets.