Creating a Check-out
Creating a Check-out by Converting a Reservation
If you've previously created a reservation for assets and it's time to pick it up (pick up your equipment), you can convert the Reservation to a Check-out.
-
Navigate to Reservations on the left-hand menu, click Filters, change the Status to Draft (or Reserved) and click Apply.

-
Click on the item/kit you'd like to checkout.

-
From here you can add additional items or kits or click Reserve.
NOTE: You'll have a chance to review and edit the Reservation before finalizing it.
You can read more on our How to Create and Manage Reservations guide.

-
Here you'll see that the draft has turned into a Reservation. Depending on the subscription service you have, you will then either click Proceed to pick up or Proceed to check-out.

Enabling Quick Check-outs
Quick Check-outs let you skip the picking process and convert eligible reservations to check-outs in a single step.
Limitations to keep in mind
- If your workflow has required fields on check-out, they will still need to be completed before a check-out is active
- Unavailable items cannot be swapped out if picking process is skipped, and will be excluded from check-out
How to enable
- Navigate to Settings in the bottom left corner of your screen and click Add-ons.

- Make sure Check-outs is set to Active and then click Settings.

- Next, toggle on Quick check-outs and then click Save.

TIP: After enabling, open a reservation with available items and use Proceed to check-out to experience the one-step conversion.
Creating a Check-out from the Check-out Tab
-
Navigate to Check-outs on the left-hand menu and click New Check-out in the upper right hand corner.

-
Enter a Name for your check out, if you have multiple locations choose the Location, set the From/To date and select the User (who will be checking out the items or kits).
- Add any additional information to the left under the Extra Info section. The required fields will be marked with a red *.

-
Click Add items or kits or use the Scan option to scan items that are being checked out.

-
Once everything is finalized, click Check-out to confirm.

NOTE: Items added to a Draft Check-out will be marked as "checking out" and unavailable for others to reserve. Clear out your Draft Check-outs regularly or set up an automatic clean-up to avoid confusion.
Creating a Check-out from the Quick Actions Button
While creating Check-outs often involves finding specific equipment, Cheqroom offers a streamlined approach using the Quick Action button near the main search bar:
- Navigate to the top right of your Cheqroom account and click the Shopping Cart (Quick Action Reservation/Checkout). Then click Check-out.

- Select the User, click Add equipment to check-out and add the items. Once finished, click Go to check-out.

- Enter a Name for your check out. If you have multiple locations within your Cheqroom account, you might see a pre-filled location based on your past activity. You can change this location if needed by selecting the appropriate one from the dropdown menu.
- Set the From/To date and if you need to change the User, you can do so by clicking User and updating the field.

-
You can add additional items or kits to the Check-out prior to checking out. Click Add items or kits or use the Scan option to scan additional items you'd like to add.

-
Once you've identified the equipment, check the box next to each item's name to add them to the Check-out. You can add multiple items at once. Additionally, you can also Remove items from here as well. Click the Check-out button to finalize the process.

By following these steps, you can initiate a Check-out quickly and efficiently, ensuring you have the Item you need exactly when you need it.
Completing a Check-in
After you’ve finished using the booked equipment, or the due date for your check-out comes, you can complete a Check-in to mark the items as available again.
-
To check-in items or kits, click on Check-outs and Filter by Checked out status. Next, click Apply.

-
Click on the Check-out that you'd like to check back in.

-
To select specific items for check-in, use the checkboxes or scan the barcodes.

- Next, click Check in or if you have multiple locations, click the drop down carrot and select the location.

- Now you can see your check in is completed (Closed) and your items are showing as Checked In.

NOTE: If you only check-in some items, the Check-out will remain open. The checked-in items will become available again, while the remaining items will stay booked.
Managing Check-outs
Once a Check-out is created, Cheqroom offers functionalities to manage its status and ensure equipment is returned on time.
Check-out Statuses
-
Draft: The Check-out hasn't been fully booked yet -- you're still working on it. During this time the items are marked as Checking out.
-
Checked out: The equipment has left with the check-out and is expected to be back at the Due date. The Check-out remains open until all equipment has been checked in again.
-
Overdue: The equipment is still checked out. Some or all pieces of equipment haven't returned as a check-in at the agreed time
-
Closed: All the equipment from the Check-out has come back and was checked in again.
- Archived: This status is applied to items that have been checked out and successfully checked back in, and you are looking to preserve the historical data in the system.
Updating a Check-out
As long as the Check-out is in "Open" status (equipment is out on loan), you can edit details like due dates, contact information, or equipment list.
-
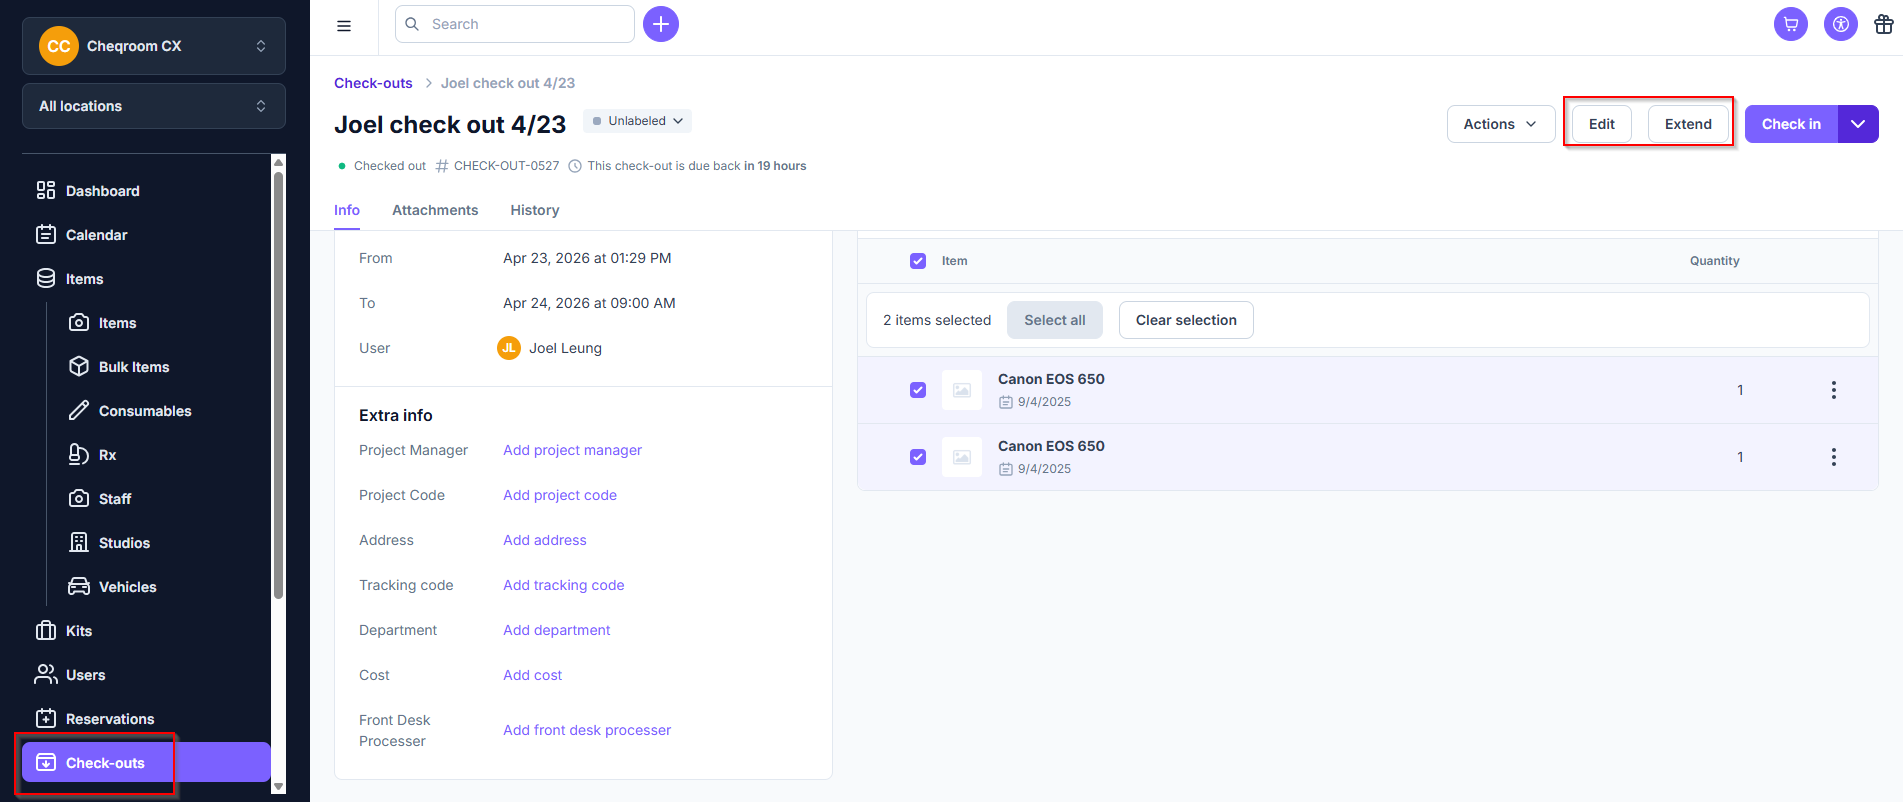
Go to the Check-out screen by clicking on Check-outs and then selecting the specific Check-out. Next, click Edit.
- Clicking Edit will allow you to change the Check-out details or add/remove items.
-
Click Check-out again to confirm the updates.

NOTE: The From date will automatically update to the current time upon editing.
Extending a Check-out
If equipment needs to be returned at a later date than originally specified, you can extend the Check-out.
-
Go to the Check-out screen by clicking on Check-outs and then selecting the specific Check-out. Next, click Extend.

-
Choose a new Due date and time.

-
Finally, click Extend and you're done!

Archiving Old Check-outs
Over time, you can archive completed Check-outs to declutter your workspace. By default, Cheqroom automatically archives Check-outs that are a year or older since completion.
To manually archive a Check-out:
-
Click on Check-outs and then Filter for the Status of Closed and click Apply.

-
Select the completed Check-out(s) you want to archive and click Bulk actions>Archive.

TIP: You can also filter the Check-outs list by status ("Archived") to view archived Check-outs and restore them if needed.
By understanding how to create and manage Check-outs in Cheqroom, you can ensure efficient equipment management within your organization. This system streamlines borrowing and returning equipment, keeping track of due dates, and maintaining clear accountability.