![horizontal-black-3.png]](https://knowledge.cheqroom.com/hs-fs/hubfs/horizontal-black-3.png?width=200&height=37&name=horizontal-black-3.png)
User Groups
User Groups let you organize users by shared attributes — such as department, location, or certification level — giving you granular control over equipment access beyond standard roles and permissions.
-
Go to Settings on the left-hand side;
-
Click on Equipment access;
-
Click Create new user group;
-
Give your group a name (e.g., "Camera Operators" or "Lab Technicians") and, optionally, add a description to clarify which users belong to this group. Click Save to create the group.
Item Groups
Item groups are a way to segment Items based on Item information, including custom fields. Follow these steps:
-
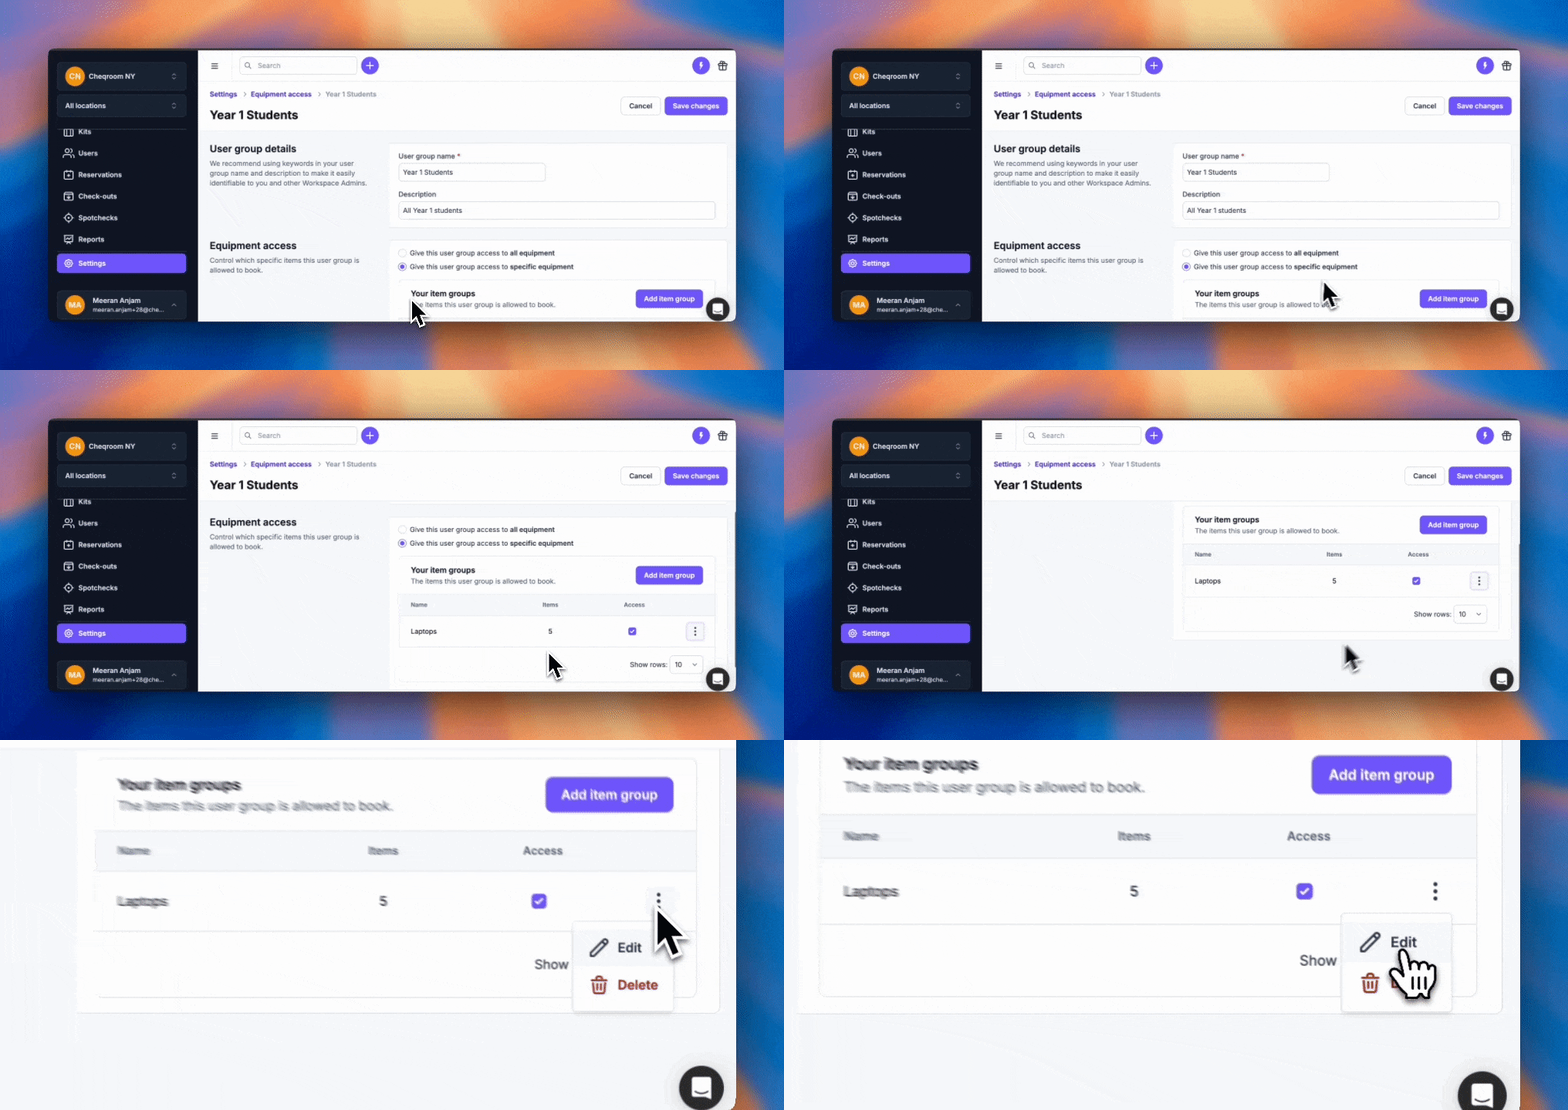
In the Equipment access settings page, select the three dots next to the group you want to edit, then click Edit.
-
Click Add item group.
-
Choose a name for the Item group.
-
Use the filters to narrow down or expand the Items that should belong to the Item group based on properties like category, brand, or custom fields.
-
Confirm with Add item group.
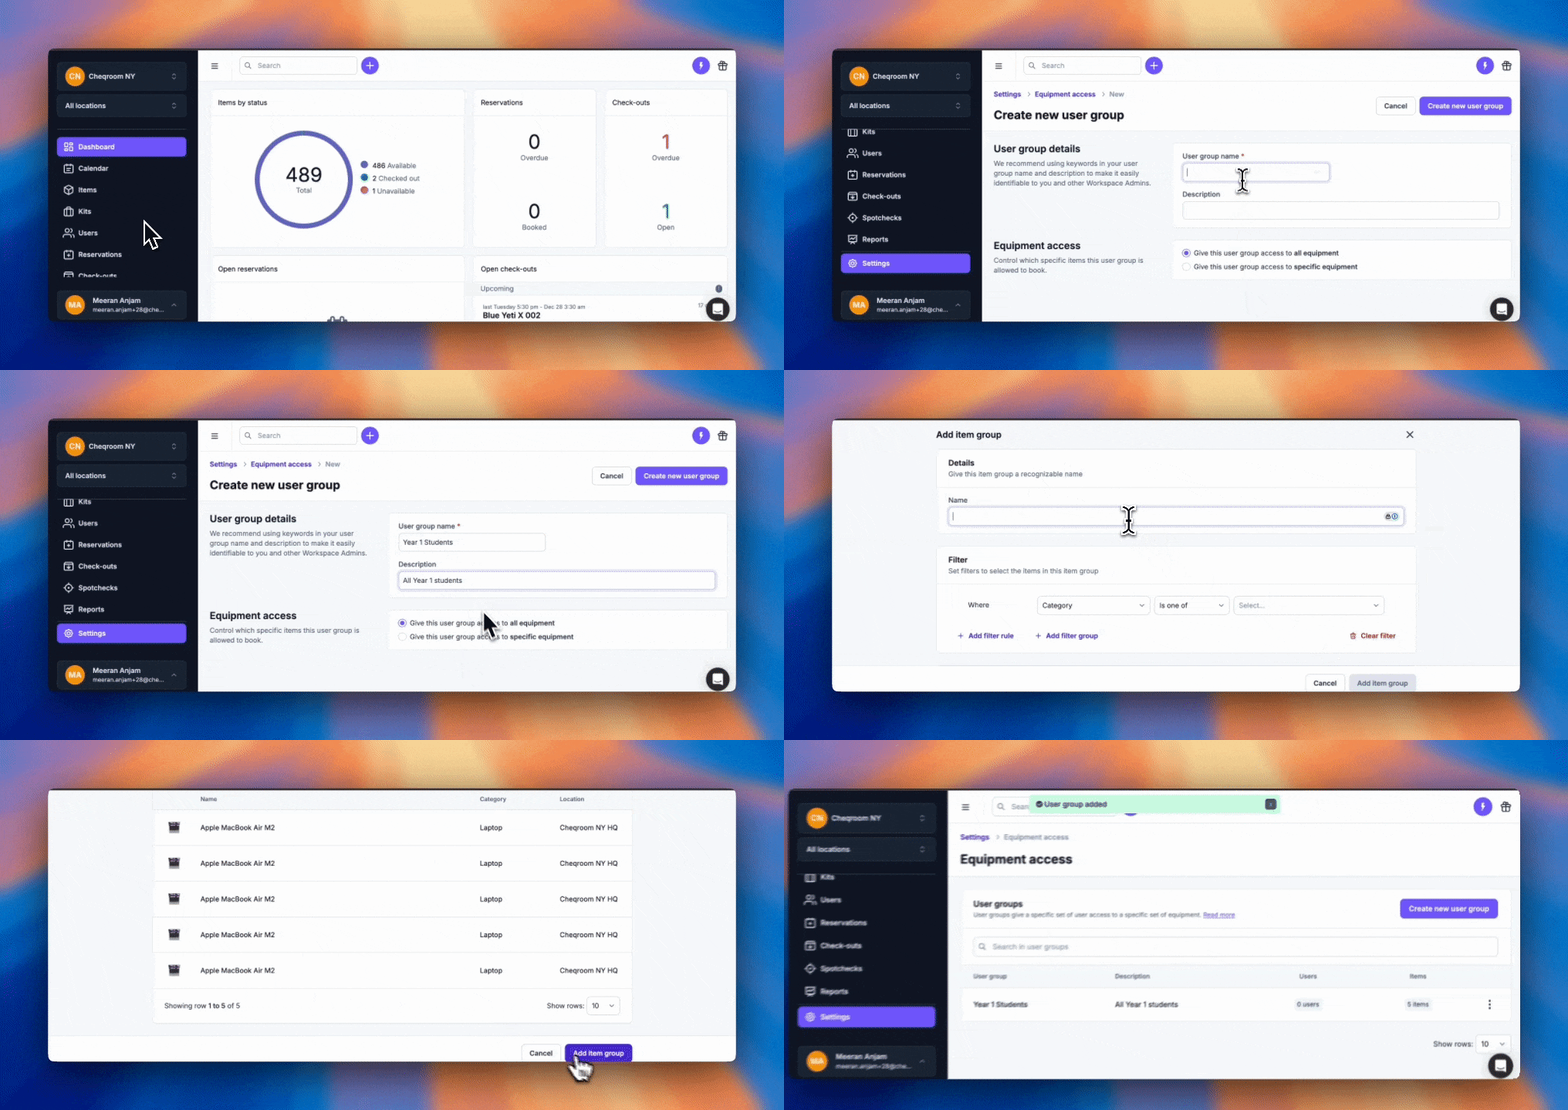
Managing User Groups
Assign Users to a User Group
After creating user and Item groups, the next step is to assign users to these groups.
-
Click on Users on the left-hand menu.
-
Select the Users you want to add to your recently created User Group.
-
Click on Action, or Bulk actions if relevant, and then Assign user group.
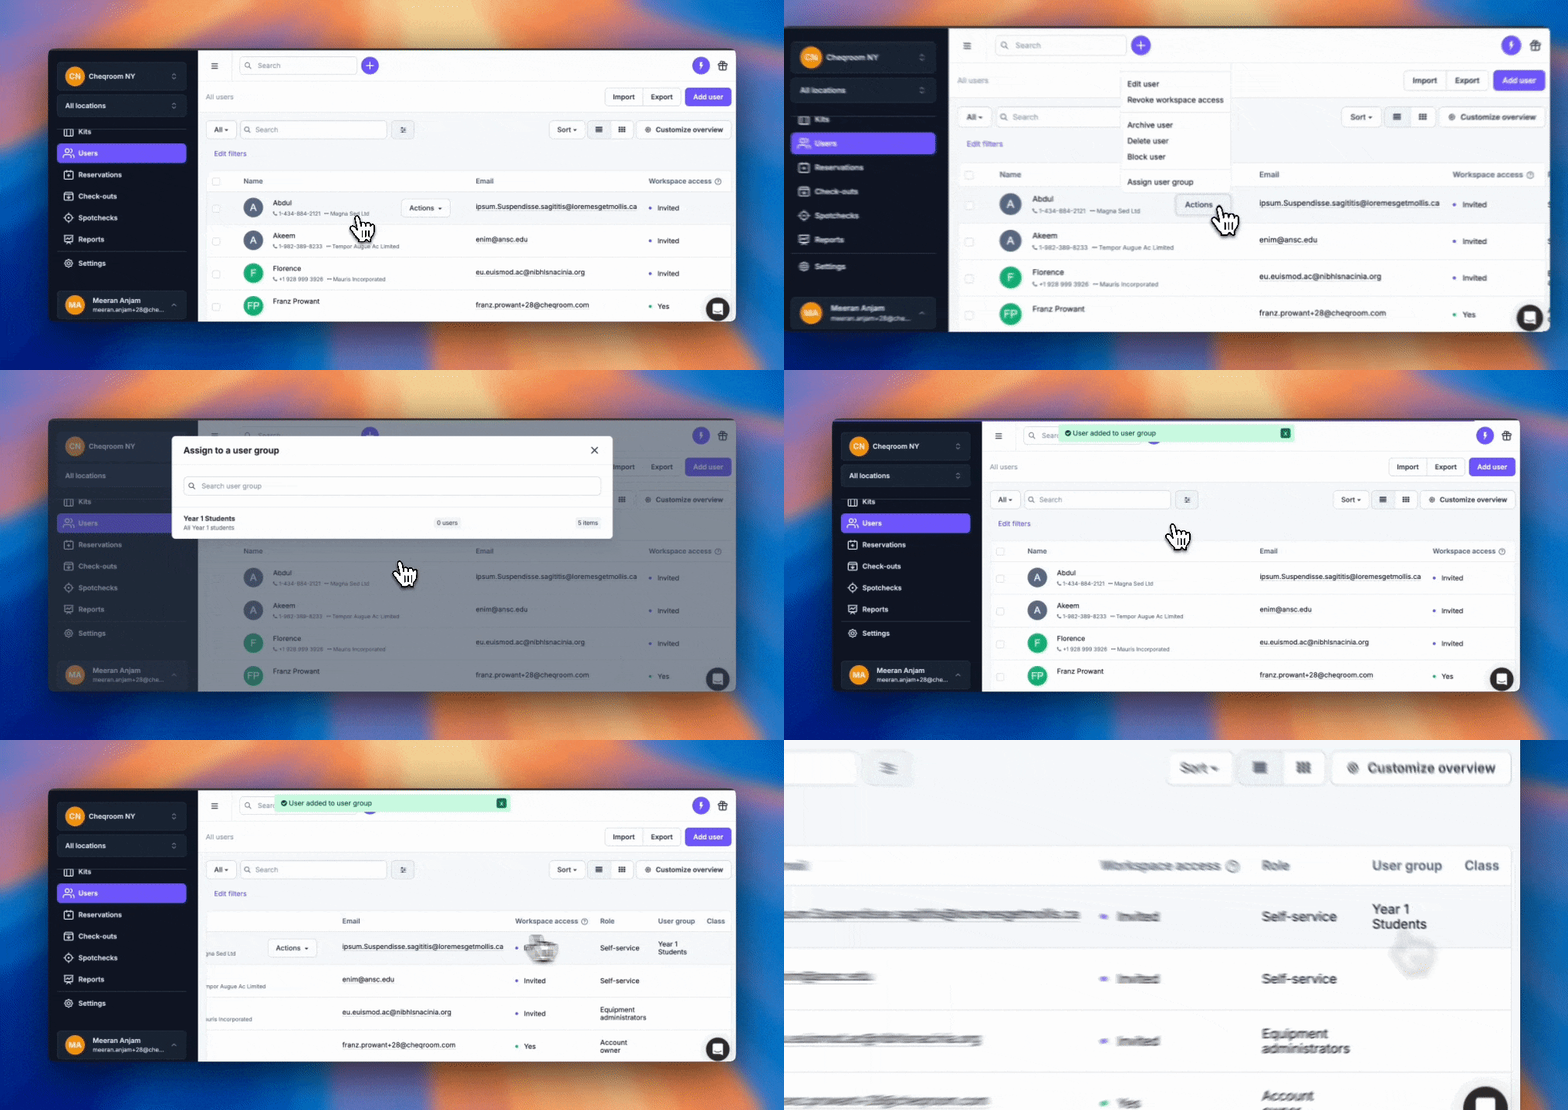
Edit User Groups
To make modifications to an existing User Group:
-
Go to Settings.
-
Click on Equipment access.
-
Select the three dots next to the group you want to edit, then click Edit.
-
Make your desired modifications and hit Save changes.
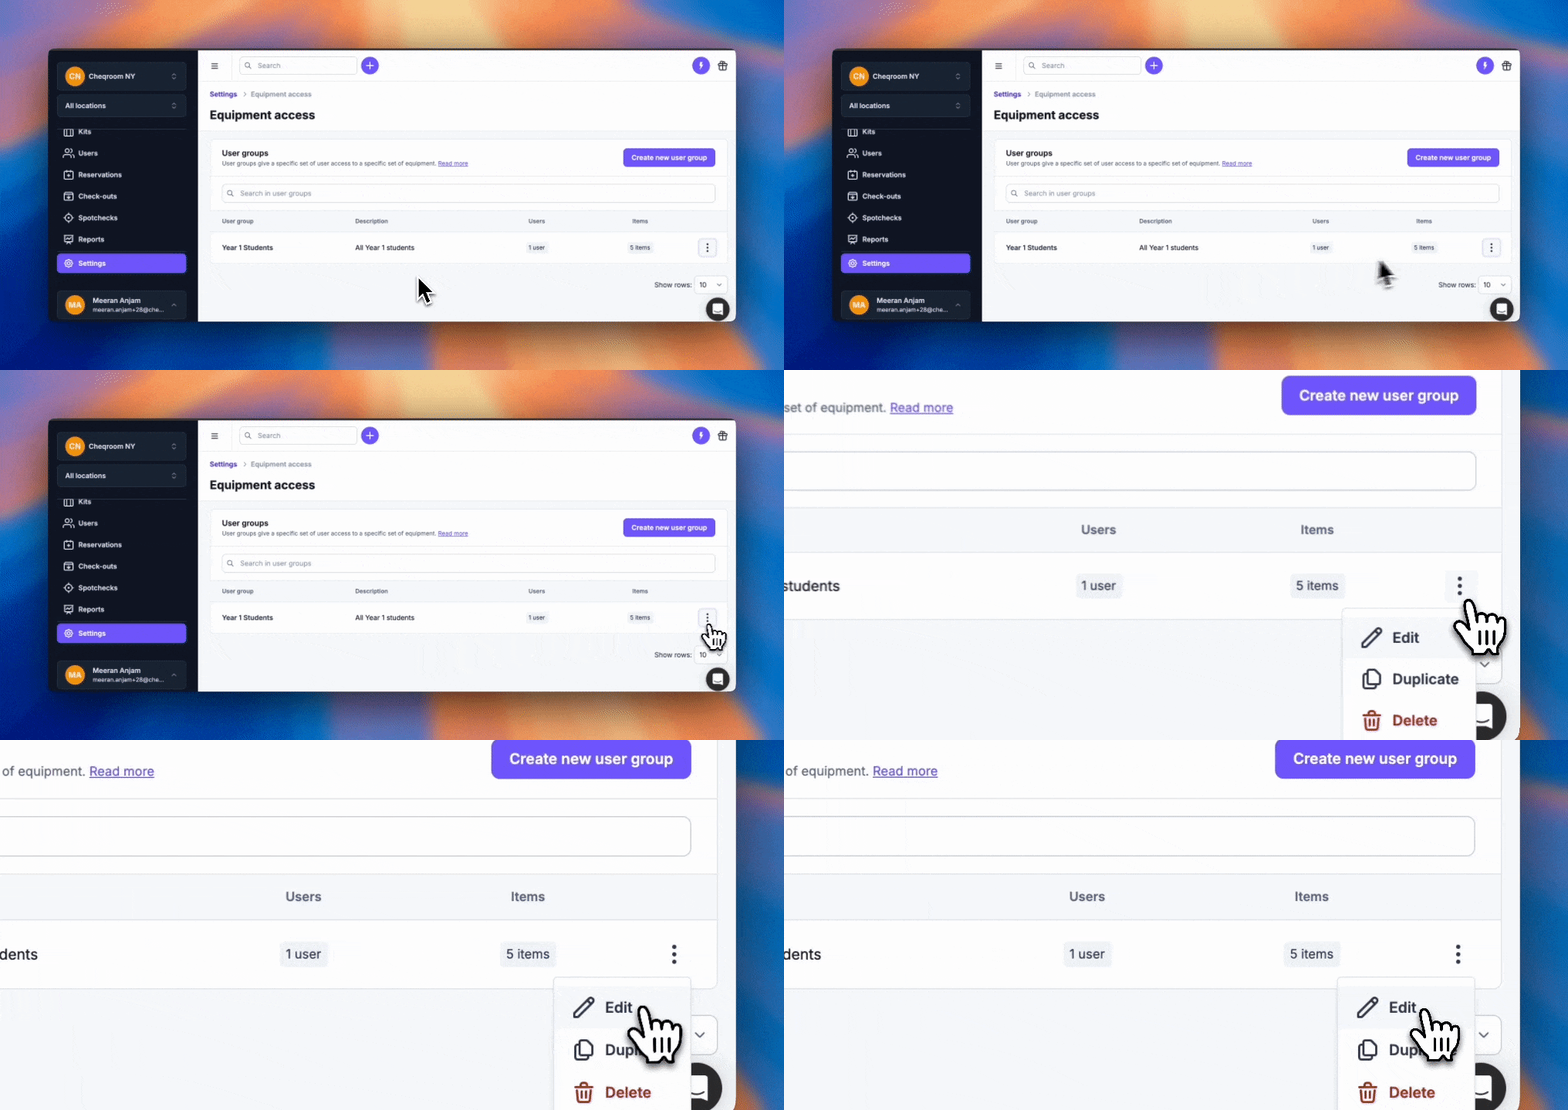
Managing Item Groups
Using Filters
Filters help segment Items based on their properties such as category, brand, purchase price, or other custom fields.
-
Filter Rules: A specific value of a property (e.g., “Canon”) or a range of values (e.g., “less than $500”).
-
Filter Groups: A collection of multiple filter rules combined with AND/OR logic to define complex Item Group membership criteria.
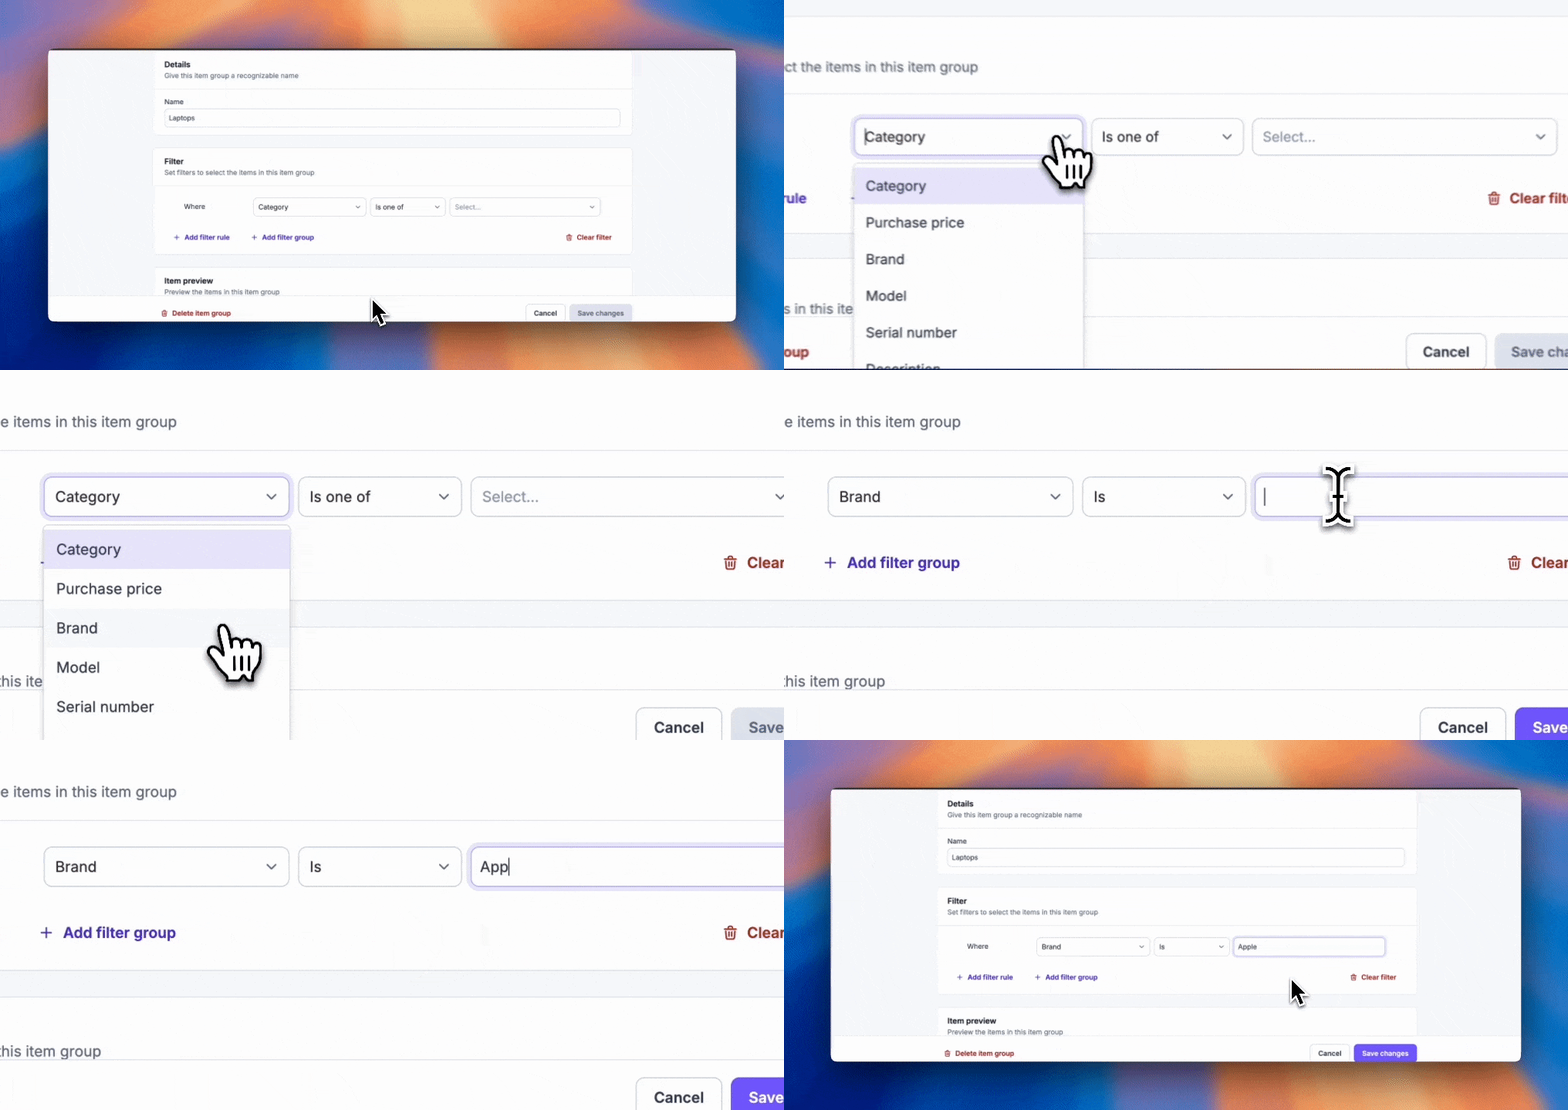
Edit or Delete an Item Group
To make changes to an Item Group:
-
Edit Group: In the User Group settings, go to the Equipment Access block, click on the three dots next to the Item Group, and select Edit.
-
Save Changes: Make your changes and click Save. To delete, confirm your choice.
Restricted Items and Equipment Access Conflicts
Users in specific User Groups are only allowed to reserve or check out items specific to that Group. This limitation improves safety, for the Users and Equipment, in specific situations.
View Restricted Items
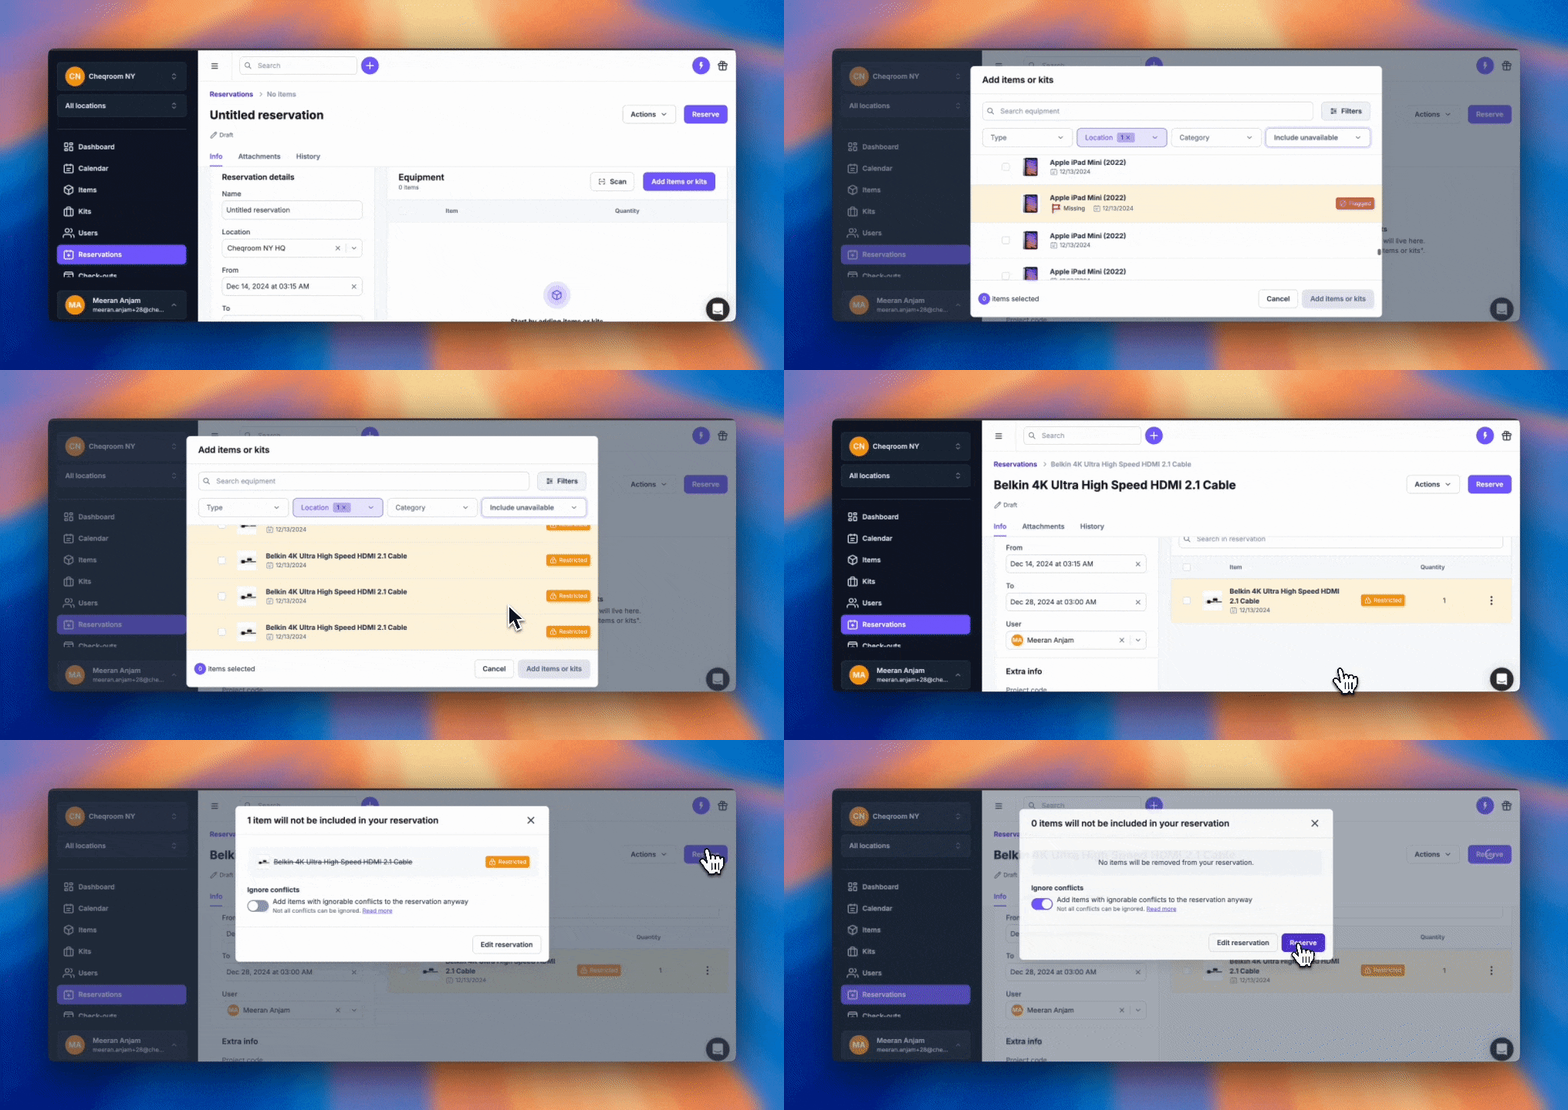
In a reservation, users can opt to view restricted items, identified with an orange Restricted modal. Unavailable items are marked with a red modal.
Adding Restricted Items
Users can add restricted items to a draft reservation, but those items will be automatically removed when the reservation is submitted if the user does not have permission to override equipment access restrictions.
Ignoring Equipment Access Conflicts
Admins can override restrictions:
-
Create your reservation as normal.
-
A modal will pop up. Click on the toggle to ignore the conflict.
-
Click Reserve to complete the reservation.
Note: By default, only account owners and workspace admins can override equipment access conflicts. Other user roles require explicit permission to do so, which can be granted in Settings > Roles & Permissions.