Prepare your Import file
-
When preparing your sheet, make sure to include Name and Email Address columns for each user, as these are required fields. The import will not be successful without them.
-
You can also include optional fields such as Phone, Company, etc.
-
Whether a user gets workspace access depends on the User Role field. If you leave this field blank, the user will be added but won’t receive access.
💡 For reference, you can download a pre-formatted CSV template here or from Users → Import.
Review your file
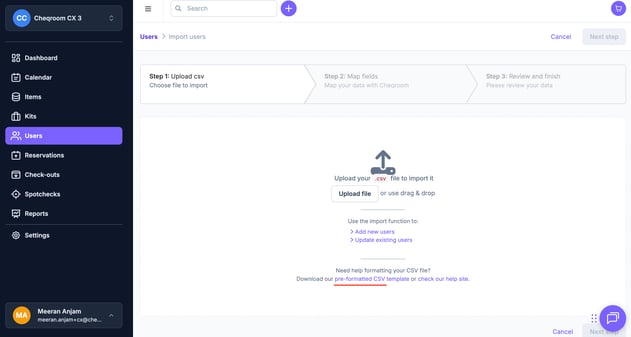
- Once your import file is ready, it should look similar to the example below. You can then upload it using the Upload File button.
-
The sample below also includes two custom fields: Phone and Company.
💡Tip: Ensure your file is in CSV format.

Start the import
- After uploading the user import file you can map the fields correctly and resolve any errors that appear. After which go ahead and start the import. The process may take a few minutes.
- While still in progress, you can click Back to Users or Upload another file while the system completes the import.
Once the upload is complete, you’ll receive an email confirming whether the import was successful and highlighting any issues, if there are any.
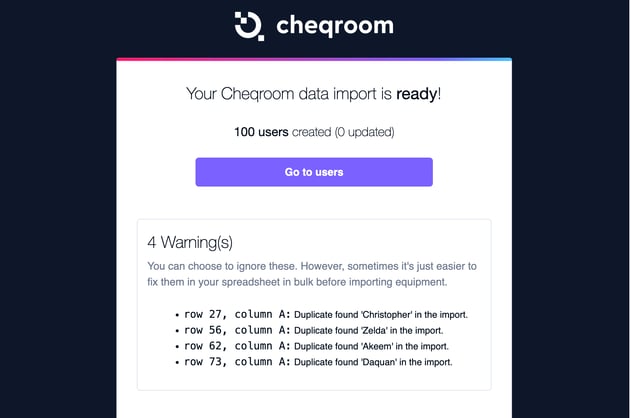
Congratulations! All imported users should now appear in Cheqroom without workspace access. 🎉
How to create bookings for users with No Workspace Access
If you have the permissions, you can assign Reservations and Checkouts to users, even the ones without Workspace Access.
-
This allows you to track which user has which gear without granting account access.
- In addition, the user without access to Cheqroom can be sent notifications. Their details can be used to send email or SMS notifications—for example, reminders when a reservation is ready for pickup or when it’s time to return checked-out gear.