If you want to add Users in bulk, you need to import a list of users. Go to the Users page and click on 'import'. This will initiate the import process.
⚠️ Please note that you need 'manage settings' permission to import Users. If you don't see the import button, your administrator will need to grant you this permission first.
Adding new Users
1. Download our template to get started
You can find a pre-populated file here. This contains all the required columns to successfully map your data with the system fields required in Cheqroom.
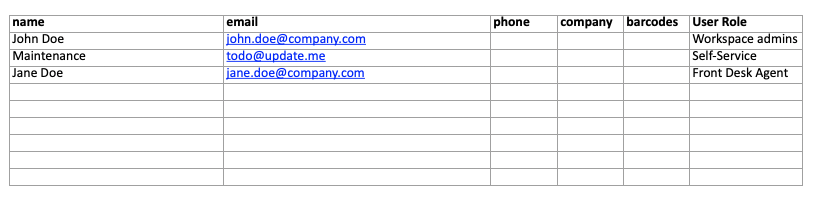
To add new Users, you'll need a Name and an Email Address. Users who will be given workspace access will also need to be assigned a User Role as well. At the end of the import process, Cheqroom will send invite emails to all new Users with a User Role.
2. Populate all the fields necessary
If you created any custom roles, you can add them in the 'User Role' column. Cheqroom will match the fields automatically at the end of the import process.
If you created Equipment Access Groups, you can assign users to these user groups via CSV upload. To add multiple groups to a single user, separate the group names with a comma in your “User Groups” column. If your user group names contain a comma themselves, include quotation marks around your user groups to properly separate.
|
Name |
|
User Role |
User Group |
|
John Doe |
john.doe@company.com |
Workspace Admin |
AV Equipment, Drones |
|
Jane Doe |
jane.doe@company.com |
Front Desk Agent |
AV Equipment |
OR
|
Name |
|
User Role |
User Group |
|
John Doe |
john.doe@company.com |
Workspace Admin |
“Cameras, Lighting”, “Drones” |
|
Jane Doe |
jane.doe@company.com |
Front Desk Agent |
“Drones” |
⚠️ If you have any required fields set on Users, those fields will also need to be completed before uploading your file. If you don't have all the data required, please use a generic placeholder or turn off the required field before initiating the import.
3. Export your spreadsheet as a .csv
Cheqroom only accepts .csv files during the import process.
4. Upload your spreadsheet to Cheqroom
Click Upload file and select the sheet you just exported as a .csv. Alternatively you can simply drag and drop the file on this page.

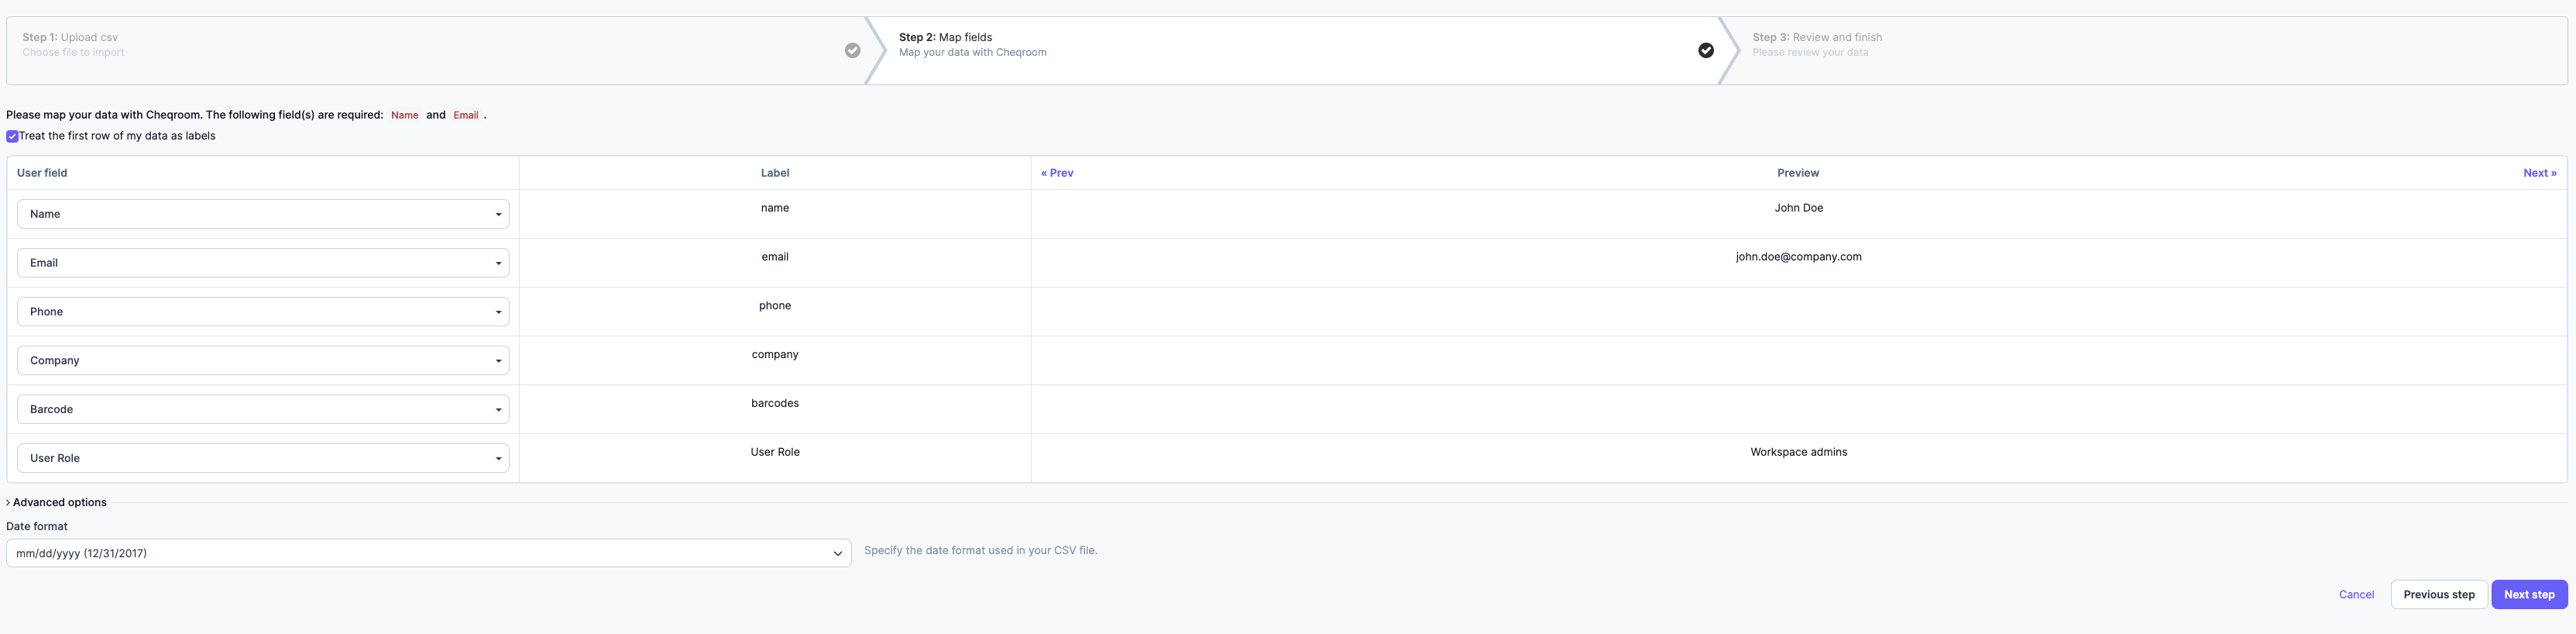
5. Be sure to map all fields
In this step, you need to map the information from your spreadsheet to the right fields in Cheqroom (if it doesn't happen automatically, f.e.: when you use custom fields or different column names in the sheet). When all fields are mapped, click 'next'.

6. Complete the process
Step 3 of the import process should show you a preview of the first 10 users you'll try to upload. Please check again if all information is added and mapped correctly. Looking good? Please click 'finish' to import all your new users.
You should also receive a confirmation email shortly.
Updating existing Users
1) Export your User list
Go to 'Users' and click on the 'export' button in the upper right corner. Please select the file type and the amount of information you want to export.
⚠️ Please note that you need 'export' permissions to export a User list. If you don't see that option in your workspace, please ask your administrator to grant you the necessary Role and permissions.
2) Update your fields
Update existing fields or add information in new columns to update your existing Users in Cheqroom. Don't update or delete the ID column fields. We need the unique User id's to map the updates correctly in step 3.
You can also add NEW Users in the process of updating existing users in bulk. New Users don't have an ID yet, so you would just need to leave that field blank in the datasheet.
3) Map the User ID when importing your new datasheet
In this step, you need to map the information from your spreadsheet to the right fields in Cheqroom (if it doesn't happen automatically, f.e.: when you use custom fields or different column names in the sheet).
Pay extra attention to the ID field that needs to be mapped. This will ensure that we update existing Users in your workspace instead of creating duplicates!
When all fields are mapped, click 'next'.
4) Complete the process
Step 3 of the import process should show you a preview of the first 10 users you'll try to upload. Please check again if all information is added and mapped correctly. Looking good? Click 'finish' to import all your new users.