![horizontal-black-3.png]](https://knowledge.cheqroom.com/hs-fs/hubfs/horizontal-black-3.png?width=200&height=37&name=horizontal-black-3.png)
Cheqroom notifications keep your team informed by automatically sending alerts via Email, SMS, or mobile push when key events occur — such as new reservations, check-outs, new users are created, spotchecks, work orders, etc. This article explains how to create, configure, and manage notifications in Cheqroom.
Creating a Notification
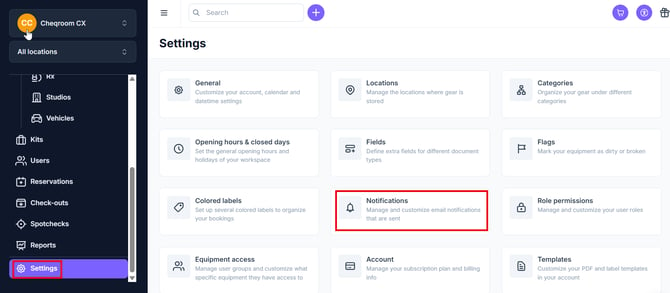
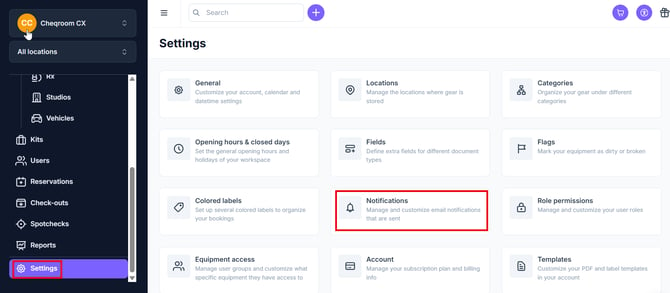
- From the left hand menu, click Settings and then click Notifications.
-
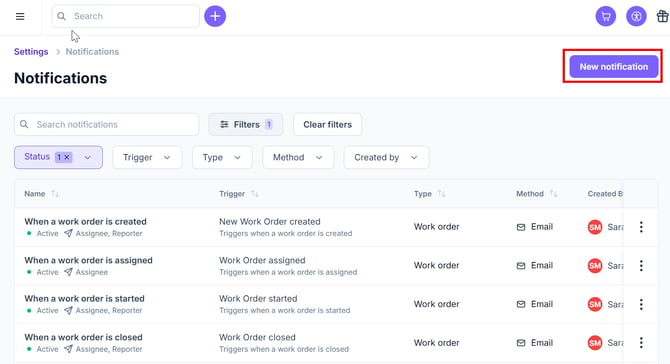
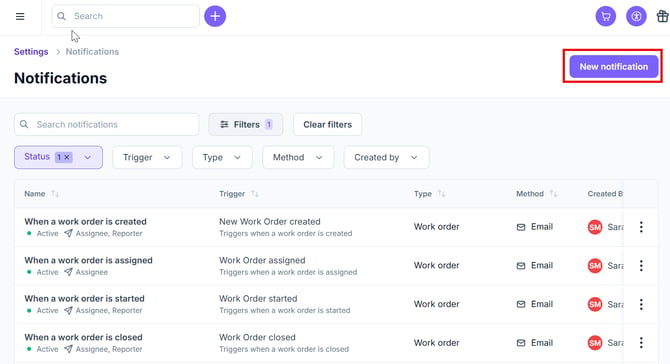
Click on "New notification" in the top right hand corner.
-
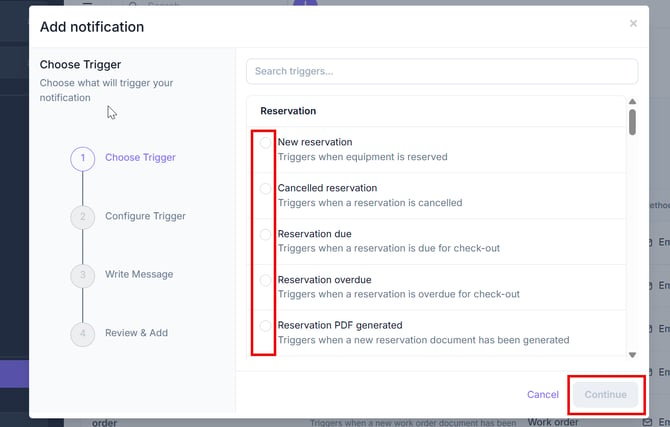
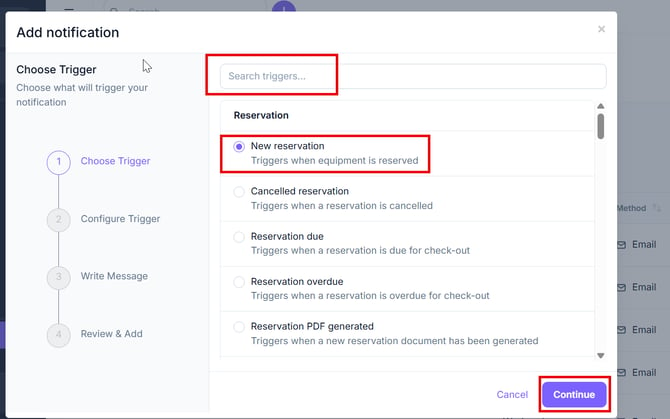
Select a trigger such as "New reservation, cancelled reservation, etc.
-
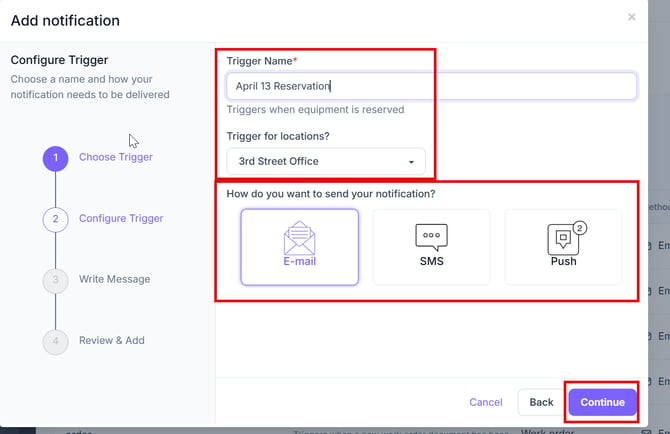
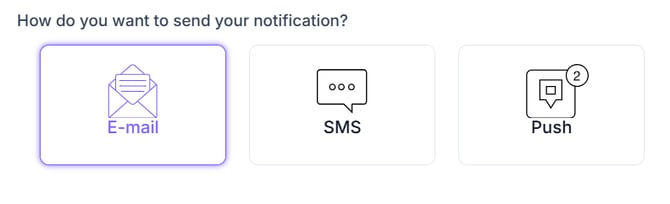
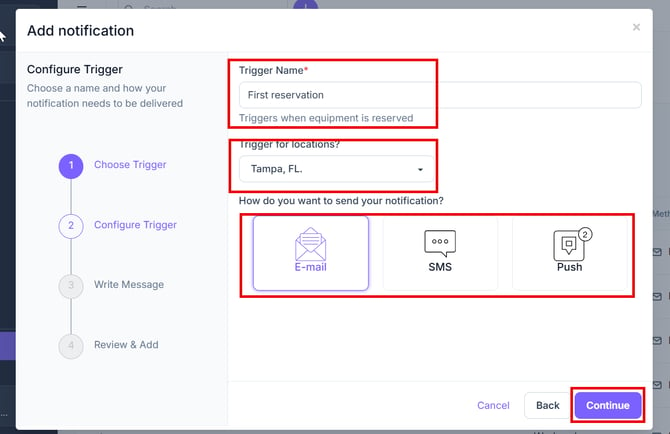
Choose a unique Trigger Name, set the trigger for the location and choose how you want the notification to be sent (E-mail, SMS or Push). Next, click Continue.
-
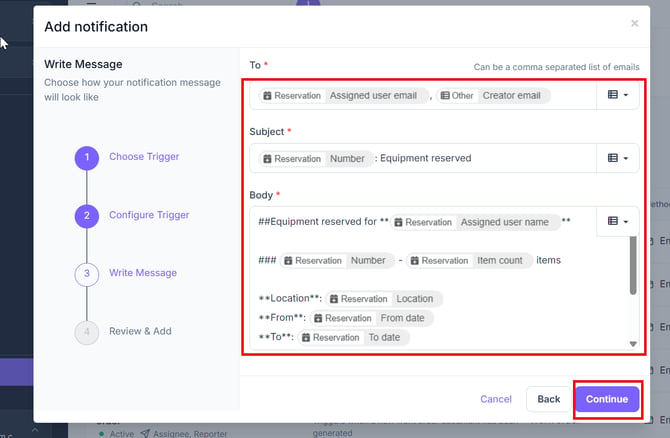
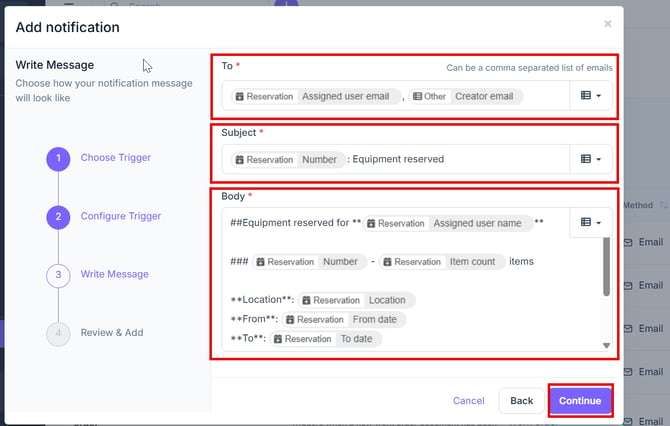
Compose your notification message (static text or dynamic variables) and specify the recipients.
-
Check the Notification Subject & Body, then click Continue when satisfied.
Types of Notifications
Email Notifications
-
Email Notifications in Cheqroom enhance communication by automatically informing users and administrators about key events.
-
You can also include PDF Templates on your E-mail Notifications by choosing triggers like 'Reservation PDF generated' or 'Check-out PDF generated', and using the "pdf preview" object in the notification body.
You can learn more about PDF templates in our How to Use, Create and Customize PDF Templates guide.
Mobile Push Notifications
-
Mobile push Notifications in Cheqroom are designed to provide real-time reminders for Users about their Reservations and Check-outs directly on their mobile devices.
-
The key difference from other notification types is that users control whether push notifications are enabled or disabled directly from their mobile device settings.
NOTE: Notifications can be turned off in the general settings on the mobile phone if desired.
SMS Notifications
-
SMS Notifications provide another way to remind Users about their Reservations and Check-outs via text messages.
NOTE: You can view the logs of SMS Notifications and monitor your SMS quota under the Account settings page.
Finding a Notification
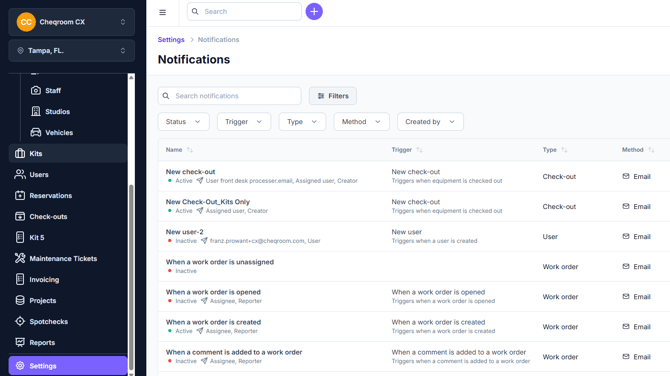
- The Notifications overview shows active notifications by default. Search by name or trigger, filter by type, status, creator or trigger, and sort by column. Use Preview in the actions menu to see a notification's final message without opening the editor.
Editing Notifications
-
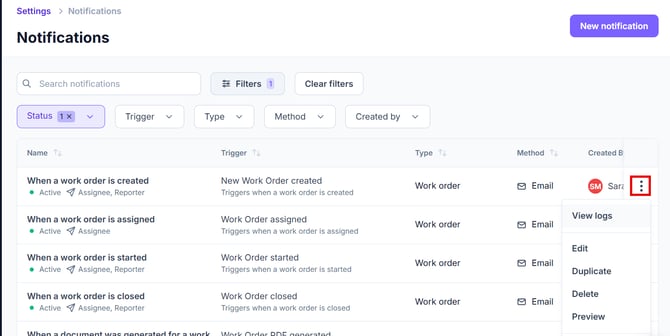
All notifications can be edited to all parameters by clicking on the 3 dot menu, as seen below. This will show a pop-up menu for viewing logs, editing, duplicating, deleting, or previewing.
Custom Date Field Notifications
Cheqroom allows you to trigger Notifications based on custom date fields for Items, Reservations, or Check-outs, ensuring timely alerts for events such as calibration dates or equipment overhauls. Learn more about custom fields in our Manage Custom Fields guide.
Setting Up Custom Date Field Notifications
-
After a custom date field has been added, click on Settings, then Notifications.
-
Next, click New notification.
-
You can Search Triggers or find the trigger you'd like to use and click on it. Next, click Continue.
-
From here you can Name the Trigger, add any locations and then set up How do you want to send your notification?
-
Now click Continue.
- Next, build out the notification that you'd like to receive and click Continue.
-
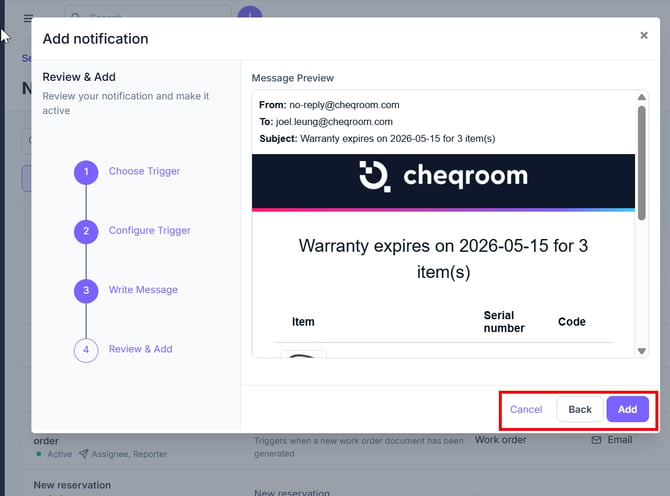
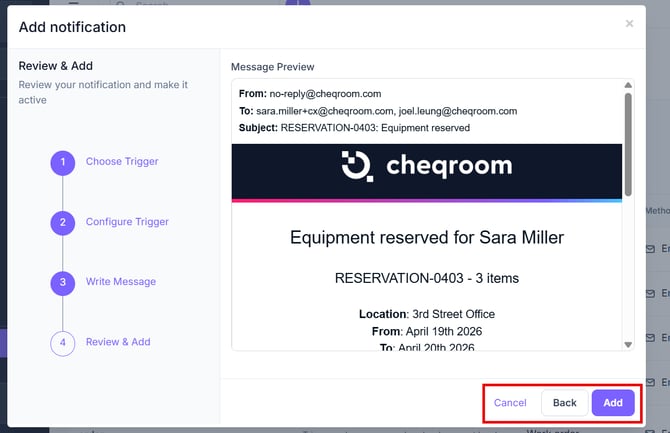
On this screen, you can see exactly how your notification will appear to users.
-
To proceed: If you are satisfied with the preview, click Add.
-
To edit: If you need to make adjustments, click Back to return to the previous settings.
-
To discard: If you no longer wish to create this notification, simply click Cancel.
-
Warranty Reminders
Automated warranty reminders notify users before the warranty of an Item expires, ensuring timely action.
Setting Up Warranty Reminders
- Click on Settings and then Notifications.
-
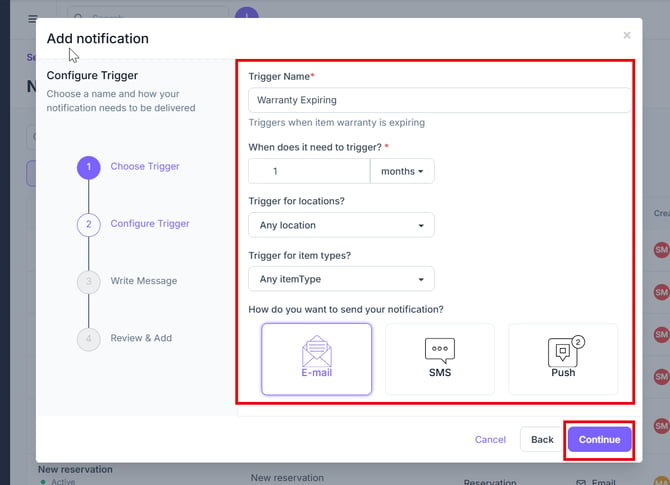
Click to add a New notification, and choose the trigger Warranty Expiring. Next, click Continue.
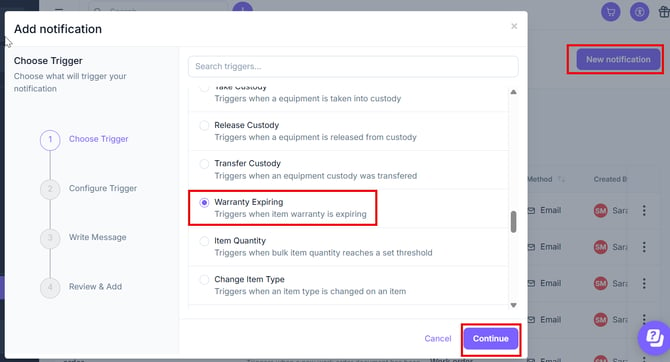
- From here, create the Trigger Name, When does it need to trigger, Location, and Item Type.
- Under How do you want to send your notification?, choose Email, SMS, or Push, then click Continue.
-
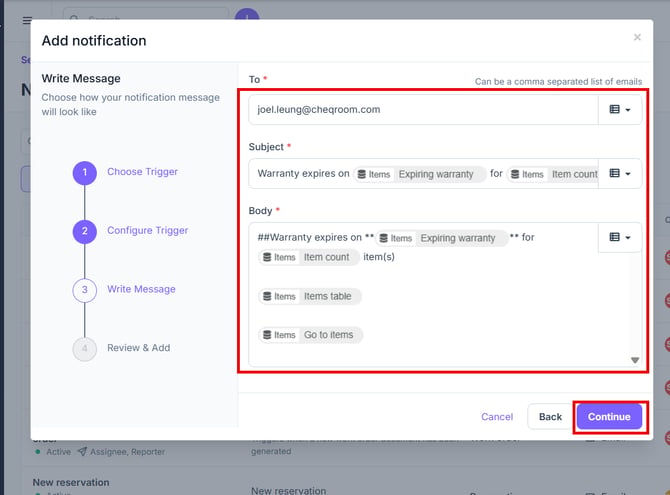
From here you can add who you would like the notification to go To, add the Subject and then create the Body of the notification. Once done, click Continue.
-
On this screen, you can see exactly how your notification will appear to users.
-
To proceed: If you are satisfied with the preview, click Add.
-
To edit: If you need to make adjustments, click Back to return to the previous settings.
-
To discard: If you no longer wish to create this notification, simply click Cancel.
-